This weekend I had SO much fun with my friends. It was honestly so nostalgic: slowly walking around, picking flowers, gossiping over piping hot tea, and just having a little whimsy analog, offline moment. Our flower cards literally looked like little pieces of art by the end of it. I’m obsessed.
The idea is simple: you walk around picking fresh flowers, then arrange them onto the printed flower vase card I made (or you can DIY your own) to create your own bouquet artwork. Afterward, you can press and preserve the flowers as a keepsake which is what I’m doing right now, so wish me luck.
This is such a fun, creative, and FREE activity to do with friends or even by yourself.
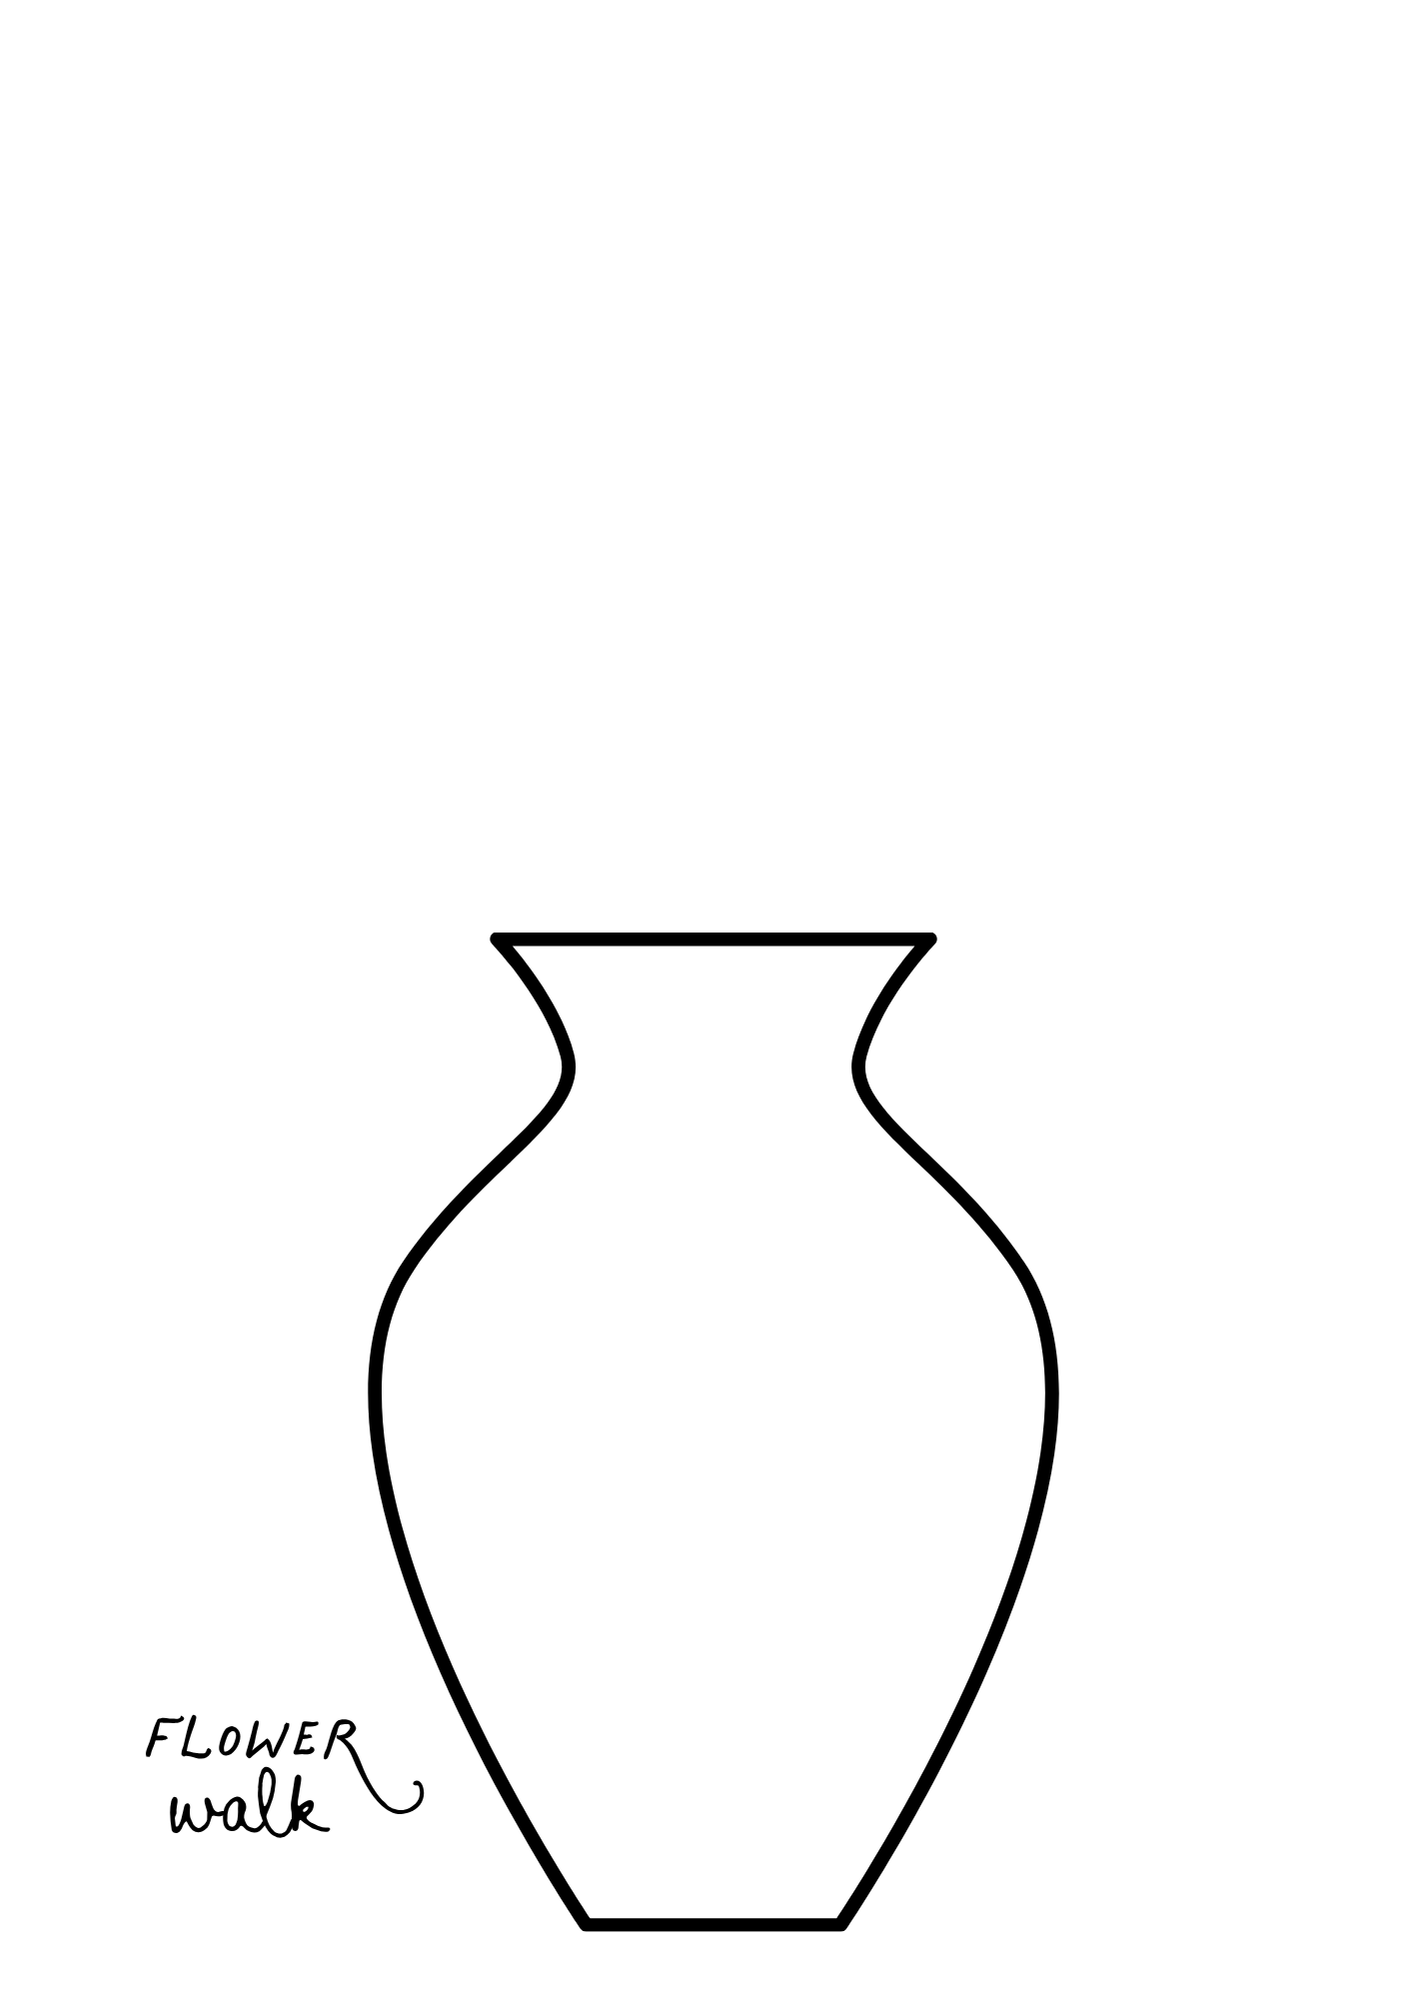
I uploaded my flower card template so you can use it if you want. I recommend printing it onto cardstock or thick paper/board. I also used an ice pick to poke tiny random holes into the bouquet area so the flower stems could slide through easily.
What You’ll Need
- Printed flower vase template
- Cardstock or thick paper/board
- An ice pick to poke holes- I personally found this worked best
- Optional if you want to press the flowers: Parchment paper and Heavy books for pressing
How to Make Your Flower Walk Card
Step 1: Print the Vase Template
Print the flower vase template onto:
- cardstock
- thick paper
- or lightweight board
This helps the flowers stay secure and keeps the card from bending. You can also scale the image up or down depending on the size you want. Mine was about 5″x7″.
Just save the image below and print it out OR everyone can draw their own on card stock or a brown box cut out.
Step 2: Poke Small Holes
Using an ice pick, poke tiny random holes around the bouquet area above the vase. Don’t overthink this part and promise me- trust the process! The flowers naturally layer and overlap in different directions, which is what makes it look so pretty and whimsical.
Step 3: Go on Your Flower Walk
Walk around your neighborhood, park, garden, or outdoor space collecting flowers, leaves, and tiny stems. Look for:
- colorful petals and flowers
- greenery for texture
- tiny filler flowers
Step 4: Build Your Bouquet
Slide the flower stems through the tiny holes to create your arrangement.
Layer different colors and textures together. It’s always so exciting to see how everyone’s bouquet turns out differently, and honestly, the “imperfections” usually end up making it look even prettier.
Step 5: Press & Preserve Your Flowers
Once your flower card is complete:
- place parchment paper over and under the card
- put it inside a heavy book or under stacked books
- leave it pressed for 1–2 weeks
Make sure the flowers are fully dry before framing or storing them.
Tips for the Best Pressed Flowers
- Thin flowers press best
- Keep flowers out of direct sunlight while drying
- Replace parchment paper if it gets damp
- Fully dried flowers should feel crisp and papery
Make It a Cute Friend Date (or Solo Date)
You can turn this into:
- a picnic activity
- girls’ day
- cute solo date
- evening at the park
- tea & gossip catchup LOL
The best part is that everyone’s bouquet ends up completely different.
And once the flowers are pressed, you have a real keepsake from the day. PS: you can even write the date on the back to remember it forever.
If you try this, send me photos on IG because I would LOVE to see how yours turns out.


Leave a Reply